Armour Stone Basics: Building Strong and Beautiful Retaining Walls
For professional landscapers and contractors, armour stone is a preferred material for constructing retaining walls and other structural landscape features. Known for its natural strength and rugged beauty, armour stone adds both durability and visual appeal to any project. Whether you’re working on a residential backyard or a large-scale commercial property, mastering the proper techniques for building with armour stone can set your work apart and ensure long-lasting results. Below are detailed tips to help you use armour stone effectively and confidently.
Choosing the Right Armour Stone
Not all armour stone is created equal. Stones vary significantly in size, shape, texture, and weight. Selecting the right stone mix is essential for achieving both structural stability and an appealing design. Flat, rectangular stones are ideal for creating clean, consistent lines in a retaining wall, while irregularly shaped stones can lend a more natural, rustic look. When possible, visit the supplier to hand-pick stones that match the intended design and fit together well.
For retaining walls, the size of the stone should correspond to the wall height. As a guideline, larger and deeper stones are better suited for taller walls, while smaller pieces are appropriate for low garden borders or decorative features. A good ratio is to use stones at least twice as deep as they are high. Deeper stones provide better weight distribution, helping create a solid, stable structure.
Building a Solid Base
A retaining wall is only as strong as the base it rests on. Proper foundation preparation is critical. Start by excavating a trench below grade; typically, the depth ranges from 6 to 12 inches, depending on the height and design of the wall. The trench should be wide enough to accommodate the depth of the stone plus additional space for backfill.
Once excavated, fill the trench with a well-compacted layer of aggregate. Use a mechanical plate compactor to ensure the base is level and firm. The first course of armour stone should be placed partially below grade, resting solidly on this compacted aggregate base. This buried first row acts as an anchor, preventing forward movement or shifting as the wall ages.
Planning for Drainage
Water buildup behind a retaining wall is a common cause of failure. Hydrostatic pressure can push against the stones and compromise stability. To prevent this, install a perforated drain pipe behind the first course of armour stone at the base of the wall. This pipe should be surrounded by free-draining aggregate, such as clear crushed stone.
In addition, line the soil side of the backfill with a layer of landscape fabric to reduce soil migration into the drainage aggregate. Good drainage ensures water flows away from the wall instead of building up behind it.
Correct Stone Placement and Stacking
The way armour stone is stacked has a major impact on the overall strength of the wall. Start with the largest, flattest stones on the bottom course. Stagger vertical joints between courses whenever possible to create a stronger bond. Avoid creating continuous vertical seams that can weaken the structure.
Use a level to check each stone as you go. Small adjustments can be made with pieces of aggregate or shims to achieve even, consistent courses. If the wall starts leaning or becoming uneven early on, it will only worsen as more courses are added. Patience and precision at this stage pay off later.
Backfilling in Layers
Backfill should be done gradually as each new course of armour stone is placed. After setting each row, add aggregate behind the wall and compact it thoroughly before moving on. Layered backfilling minimizes settlement and helps lock the stones into position. Avoid using soil as backfill—it holds water and creates unnecessary pressure on the wall.
Reinforcing Taller Walls
Retaining walls over four feet high may require extra reinforcement. One common method is to incorporate a geogrid between courses. Geogrid is a strong synthetic mesh that extends back into the retained soil, effectively tying the wall and soil together. This reinforcement spreads loads and reduces the risk of wall failure.
Adding Professional Finishing Touches
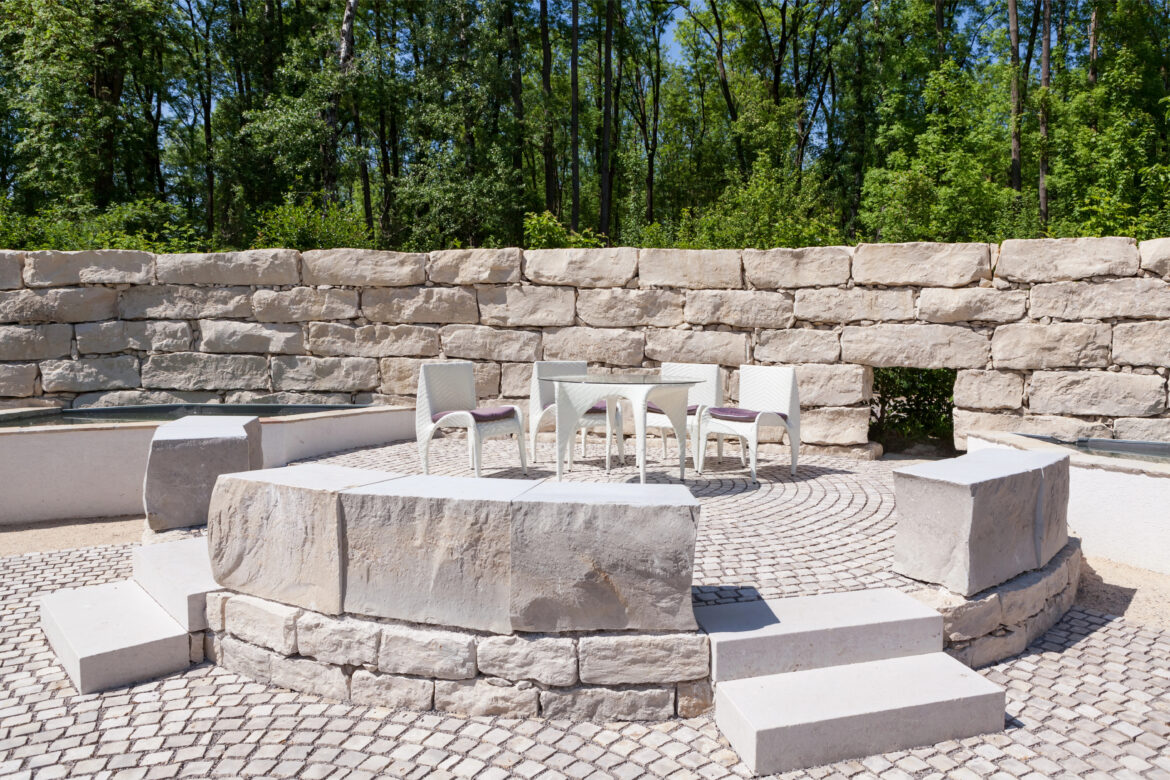
The final course, or cap, should be carefully selected for appearance and stability. Caps or coping stones give the wall a polished look and protect the courses below. If your design includes integrated steps, seating areas, or transitions into other landscape features, plan these elements during the layout phase to ensure seamless integration.
Expanding Beyond Retaining Walls
Armour stone isn’t just for retaining walls. It can be used to create natural-looking garden borders, tiered seating areas, water features, or as dramatic standalone landscape accents. Using the same material across various elements of a project helps create a cohesive, high-end design that clients will appreciate.
A well-built armour stone retaining wall is more than just a functional structure—it’s an investment in durability and visual impact. Success relies on proper planning, a solid base, effective drainage, careful stone placement, and the appropriate use of aggregate. By sourcing quality armour stone and following best practices, landscapers and contractors can deliver results that not only stand the test of time but also impress clients with their craftsmanship and attention to detail.
Build Your Next Project with FSI Landscape Supply
FSI Landscape Supply offers premium armour stone, aggregate, and other landscape materials to help you create durable and beautiful retaining walls.
Contact FSI Landscape Supply today or visit our yard to source the right materials for your next project.